
So last week’s produce bag DIY was a little fancier than the bags that I started with last year. As I had mentioned, I cleaned out my closet early in 2019 and I had a lot of t-shirts left. I had already done a big t-shirt clean out a few years back and made a t-shirt quilt (my absolute favorite use for shirts that have meaning to you- old concert t-shirts, yours first marathon, etc.) but extra t-shirts have a sneaky way of making their way into a closet. One second your closet is nicely organized with pieces you actually wear, the next you have free t-shirts from charities you went to, Kickstarter campaigns you sponsored or gifts someone gave you. And guess what? You never wear them!
So here’s a project to get them out of your closet and give them a second life.
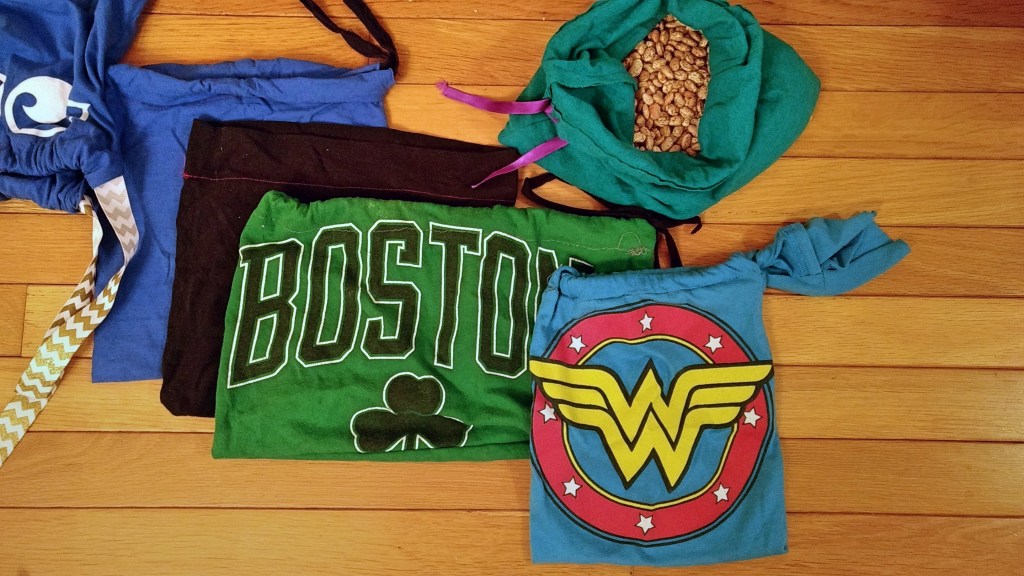
These bags are VERY similar to the produce bags that I shared with you last week except I made them months before the Spoonflower instructions landed in my inbox so the constructions was a little bit more…rustic. Also, since these aren’t made of gauze, I tend to use them for items like hemp seeds, beans and popcorn kernels- items that are smaller and don’t need to breathe, like produce.
The biggest difference is for t-shirt bags, you are often working around an existing design on the shirt which makes each one a little different.
So, I’ll be using my Veronica Mars kickstarter campaign tshirt. I LOVE the show Veronica Mars. If you have not seen it yet, do yourself a favor this MLK weekend and binge it while you make these bags. As much as I love the show, I didn’t love the material of the t-shirt so I was never wearing it.

What you’ll need:
- an old t-shirt
- scissors
- ruler
- a pen or pencil that you will be able to see on the t-shirt
- pins
- sewing machine
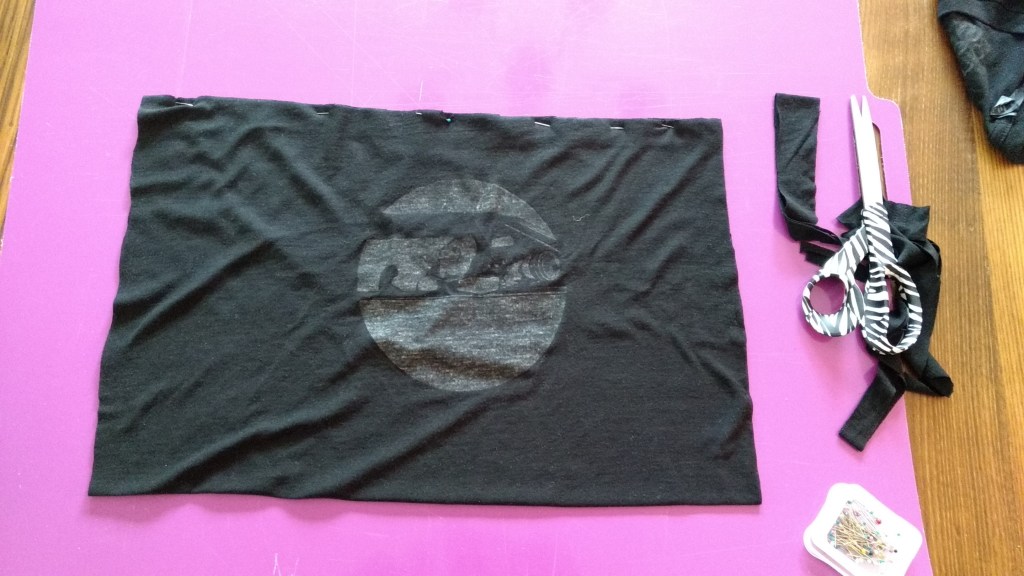
Step 1: Remove the sleeves, the collar and cut up the side seams, removing the front from the back. For now, we are focusing on the front shirt.

Step 2: Fold the bottom edge to the top edge so the right sides are facing together.

Step 3: Clean up the top and the side edges by laying a ruler along the edges, drawing a straight line and trim to even out the edges. If you have a rotary cutter, that would make this step quicker but it’s not necessary. I started by trimming the top first and then pinned across the top to make trimming the sides easier.
Step 4: Once you have cleaned up the edges of your bag, remove the pins along the top. At this point, you are going to want to rough out how wide you want your casing. The produce bag I shared last week said 3″. That’s a good measurement if you aren’t working around an image. For t-shirts with an image, fold down the top to see where you want the edge to fall. Mark with a pin where that is along each side.

Step 5: Pin the front to the back across the top and on the sides. Sew up the sides to the pin that marks your casing. I think if you don’t have a sewing machine, you could at this point use fabric glue or an iron-on hem tape. I haven’t tried that but t-shirts are a bit more sturdy than the gauze I was using last week. I would NOT use anything but sewing on the gauze produce bags.
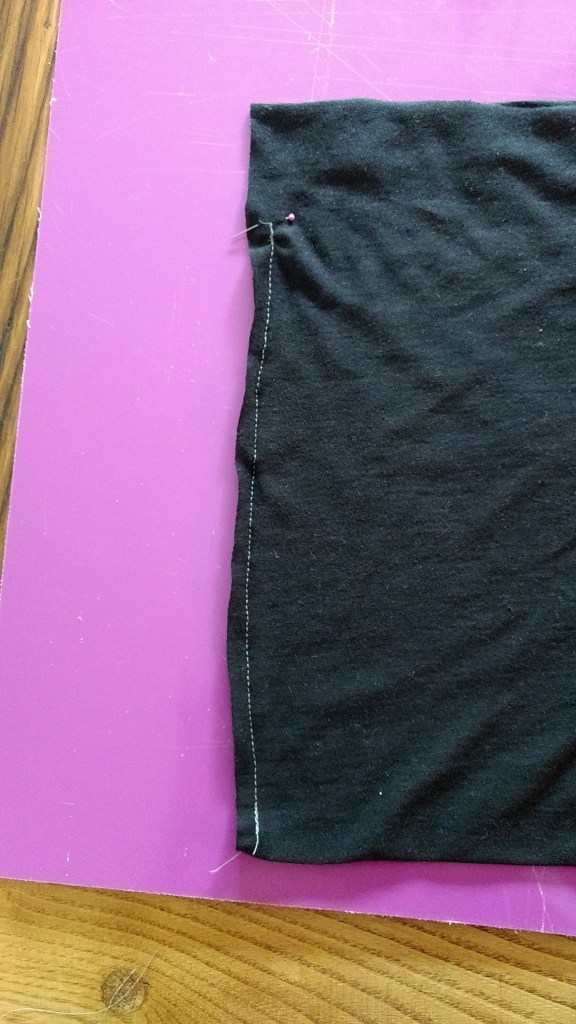
Step 6: Fold over the top edges so they line up with the top of your sewn line along the sides. Pin. Sew along the bottom of your folded line like so. In the picture below, the right side is my fold and the left is my raw edge. I used the width of my presser foot as a guide. Be careful not to sew your front and back together or you’re bag isn’t going to have an opening!

Once both tops are folded and sewn down, turn your t-shirt inside-out and you have a bag!

At this point, you can use anything as a drawstring- scraps from the shirt, ribbon, old shoe laces (obviously wash them first), etc. You’ll just want to make sure if it is a material that will fray, like certain ribbons, that you sew a line along the edges so you can wash them easier.
Put a large safety pin on one end of your chosen drawstring and feed it through your casing, pulling your draw string through.
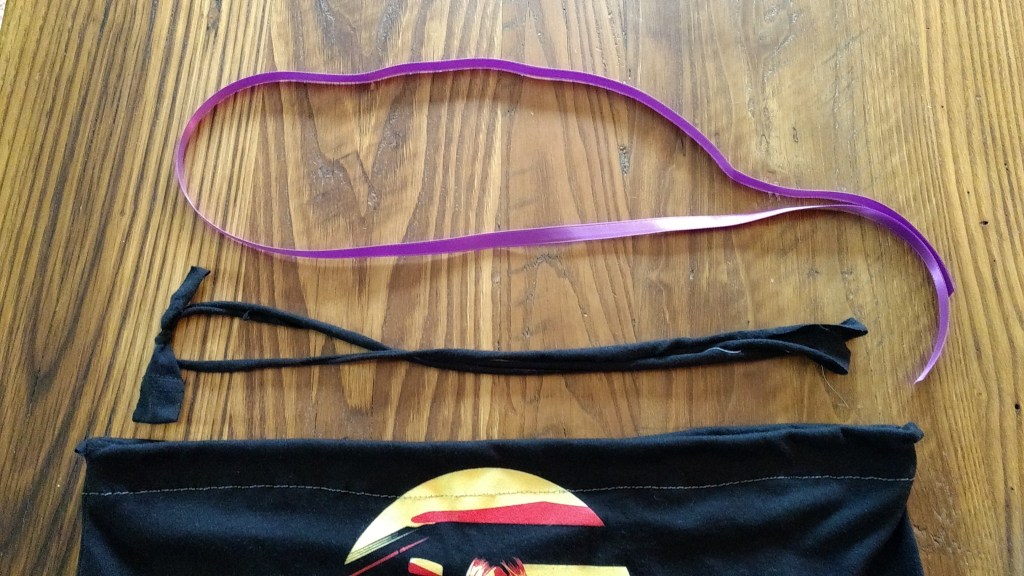
You can see some examples of different drawstrings below:


Once you have completed turning the front of your t-shirt into a bag, don’t forget to turn the back into a bag as well! I liked making two smaller bags out of the back of the t-shirts. This way, you get three bags with two different sizes per shirt.
Please note, these bags are VERY forgiving and come together quickly. Again, I didn’t have any pattern when making these so please let me know if you have any questions while making them. You can leave questions here or on my Instagram.
If you do any of my DIYs, be sure to share your projects with me. I’d love to see them!
What plans do you have for this long weekend?

[…] sit in a landfill for ever. That’s not an exaggeration- plastic never goes away. You can make these bags for free with old t-shirts and ribbon/strips from the tshirt. If you don’t have a sewing […]
LikeLike